


Performance cars demand more than factory parts – they need wiring that can keep up. A custom automotive wiring harness ties the vehicle’s electrical system together, especially under high-stress conditions. It bundles power and signal wires neatly, ensuring that sensors, ECUs, lights, and ignition systems all receive the correct current.
In racing or high-performance street builds, a tailored harness can boost reliability by using heavier gauges and higher-quality insulation than stock wiring. Whether you’re swapping an engine, adding gauges, or upgrading lights, a custom loom ensures each circuit is sized and routed correctly. This reduces clutter in the engine bay and prevents electrical issues that could prematurely end a race.
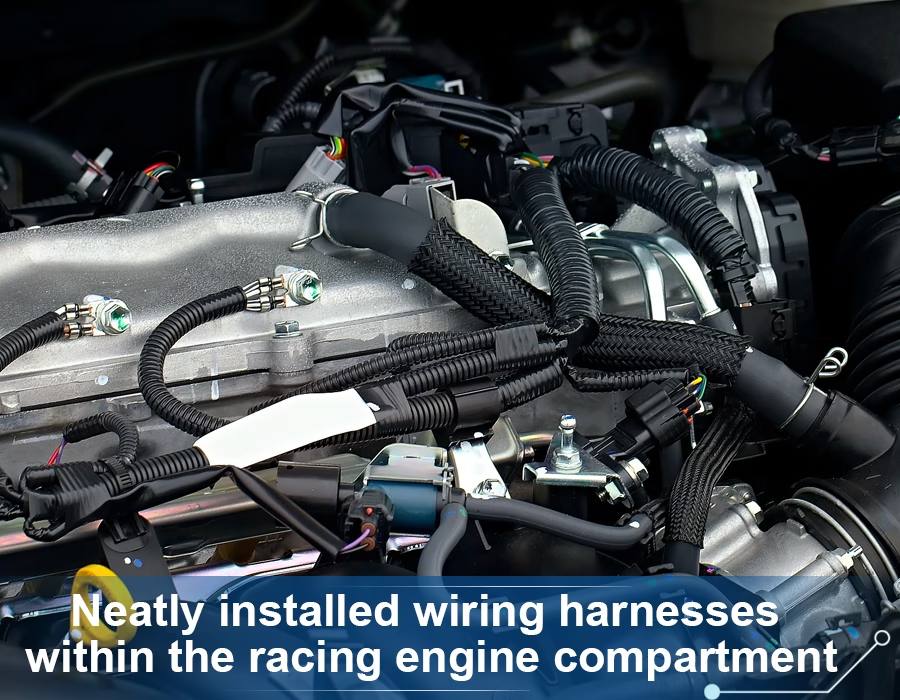
Building a custom harness means planning each connection. The photo above shows a racer’s engine bay with a clean harness installation. In practice, you’d map out every component’s location and voltage needs, then assemble wires to match – color-coding or labeling them as you go. This provides a functional diagram tailored to your specific car.
Unlike generic “one-size-fits-all” kits, a purpose-built harness only includes the circuits you need (eliminating needless wires) and uses correct wire gauges for each load. The result is a lighter, neater harness that handles the car’s power demands reliably.
Why Choose a Custom Harness for Performance
Aftermarket tuning and engine swaps often overwhelm the stock wiring. High-output alternators, fuel pumps, nitrous systems, or electric fans can draw far more current than factory wiring was meant for. A custom harness upgrades wire size and insulation (often using cross-linked polymers like TXL) so they tolerate heat and load. TXL wire, for example, has thin cross-linked polyethylene insulation rated up to about 125°C. It’s lighter and more heat-resistant than older PVC wires, making it ideal for use under the hood, where space and temperatures are extreme. Custom harnesses also add protective sleeves or conduit over wires in key areas (through bulkheads and near hot exhausts) to prevent abrasion and melting.
Good harness designers also consider connectors and terminals. For example, motorsport-grade connectors use durable plastics (PA66, PBT) and brass or copper contacts to ensure low resistance under vibration. These materials resist corrosion and fatigue, which are essential for race cars that experience high stress and exposure.
Whether you’re doing it yourself at home or hiring a professional to build it, emphasize the use of high-quality parts: high-temperature solder or crimp connections, reliable fuses/relays, and appropriately rated terminals all add up to a robust wiring system.
🔧 Want harnesses built to win (or just last longer under performance stress)?
Romtronic custom-builds performance-grade wiring harnesses using premium TXL insulation, motorsport connectors, and heavy gauge wiring — all tailored to your mod list.
📩 Get your performance harness quote & build plan now →
Key Wire Gauges and Components
Selecting the correct wire gauge and components is crucial for optimal performance. A simple reference chart helps decide a gauge by current draw:
| Wire Gauge (AWG) | Typical Current | Common Use |
|---|---|---|
| 10 AWG | ~30 A | Main power feeds (starter, alternator, etc.) |
| 14 AWG | ~15 A | Lights, fuel pump, ignition coils |
| 20 AWG | ~5–7 A | Sensors, low-power motors |
| 24 AWG | ~2–3 A | Dashboard signals, small electronics |
Above is a rough guide for copper wires. Always size up if your run is extended or if multiple bundles share a conduit. For example, high-current circuits, such as the battery cable or alternator charge lead, might even use welding cable instead of standard automotive wire. Beyond wire size, key components include proper fusing and relays at the source, as well as connectors that match your ECU or lights.
A custom harness may feature multi-pin Deutsch or weatherproof connectors for engine sensors, along with reliable crimp or solder joints on every terminal. Using a shrink tube or a heat sleeve on splices adds strain relief and insulation. Overall, focus on harness quality: better insulation and sturdier terminals pay off in durability.
DIY vs Professional Installation
Suppose you’re handy with tools; a DIY harness build can save money and let you control every detail. You’ll need wire strippers, crimpers or a soldering kit, heat-shrink tubing, and a multimeter for testing. Begin by sketching a wiring diagram, noting the voltage and ground requirements for each component. Cut wires to length, attach terminals, and assemble incrementally.
Test each sub-circuit as you go. Many enthusiasts find this rewarding, ensuring a perfect fit. However, it’s labor-intensive, and mistakes can be costly (a miswired ignition coil could cause the engine to stall). Patience and careful labeling (with every connector labeled for its function) will keep the project on track.
For complex builds or when time is short, consider a professional harness shop. Skilled shops (like motorsport specialists) often do exactly this work. As one motorsport wiring company notes, nearly all their engine harnesses are built to customer spec for aftermarket ECUs and racing engines. They can supply a plug-and-play loom that has been tested on a bench or even install it in your car.
Professionals also offer training and support as you wire up the car. The trade-off is cost. But for a multi-thousand-dollar performance build, paying for a bulletproof harness often makes sense. Either way, whether it’s a DIY project or a paid service, the ultimate goal is a harness that’s easy to install and foolproof in operation.
Installation Tips and Best Practices
In any harness project, attention to detail is key. Always label both ends of every wire (a piece of tape with text is fine). Route wires along natural paths and secure them with clamps or tie-wraps at regular intervals. Tie-wraps and spiral wrap add abrasion protection. Bundle wires logically (e.g., all sensor wires in one loom, power wires in another) to simplify troubleshooting later. Keep wires away from hot exhaust or pulleys unless they are shielded by high-temperature sleeving.
When making splices, use high-quality butt connectors or solder joints that are insulated with double-wall heat-shrink tubing. Test as you go: a quick multimeter continuity check after each critical splice or connector slip-on can prevent problems later. Remember redundancy: include a spare fuse slot or two in a fused distribution block for future add-ons. And don’t forget grounds – a shiny clean chassis ground point near every primary circuit is vital.
Finally, before final assembly, double-check polarity and fuse sizes. A 5A fuse on a 10A line will blow immediately, for example. Once installed, use a DVOM or scan tool to confirm that there are no shorts and that the correct voltages are present. A well-built harness will lie flat in the engine bay or trunk and not pull tight when you open the doors or turn the wheels.
Durability and Compatibility
Performance cars see vibration, heat, and expansion cycles. A durable harness will utilize sensor-grade wire that remains flexible in cold temperatures and is resistant to oils and fuels. Many builders add layers: cloth tape under plastic loom, then lacing tape over that. This keeps the harness tidy and serviceable. Also, use OEM-style grommets or bulkhead seals wherever the harness passes through the firewall or chassis. This stops wire chafing and keeps moisture out.
Compatibility means planning for today and tomorrow. If you’re adding a new ECU, gauge cluster, or ABS unit, ensure the harness can plug in to them without adaptation. Sometimes this means keeping some factory wiring (like the dash harness) intact and building a custom engine loom to mate to it. At other times, a complete, standalone harness is the best option. Always verify that the pinouts of any aftermarket control unit match the wire colors/gauge you’re using. Many ECU manufacturers publish connector diagrams – use them religiously.
Table: Common Automotive Wire Gauges and Uses
| Wire Gauge (AWG) | Amp Capacity | Common Use in Performance Cars |
|---|---|---|
| 10 AWG | ~30 A | Alternator feed, starter circuit, high-power accessories |
| 14 AWG | ~15 A | Fuel pumps, headlights, ignition coils |
| 20 AWG | ~5–7 A | Low-current sensors (e.g. O2, MAP), lighting circuits |
| 24 AWG | ~2–3 A | Instrument signals, CAN bus lines, LEDs |
This is a general guideline; always err on the side of a larger gauge for safety and lower voltage drop.
🛠 Building your dream performance harness?
Romtronic crafts custom engine looms with motorsport-grade connectors, future-proof compatibility, and durability against heat, vibration, and abuse — whether it’s for road-weekend or track.
📞 Get your harness built to spec & request a quote now →
Frequently Asked Questions
A: If your performance car still has stock wiring and you’re adding powerful modifications (such as turbo systems, extra electronics, or a new ECU), a custom or upgraded harness is highly recommended. It ensures adequate wire size and clean routing, reducing electrical gremlins. For a mild project, you might patch the stock loom, but full custom is best for serious builds.
A: At minimum: a quality wire stripper, crimping tool (for insulated terminals), soldering iron (for secure joints), a heat gun (for shrink tubing), and a multimeter for testing. If soldering, also get flux and rosin-core solder. Having a labeling tool or a roll of masking tape for tags is also handy. With these, you can assemble and test connectors individually.
A: Use split loom tubing or braided sleeving in engine bays to guard against abrasion. Special high-temperature loom (silicone-lined fiberglass, Nomex, etc.) can be used near exhausts or turbochargers. Always route wires under bolts or brackets where possible (clamped down). For engine compartments, PVC looms often work, but consider using Tefzel or heat-resistant tape if you live in a hot climate or run engine accessories, such as headers, close to wiring.
A: Proper crimp connections (using the right size terminal and tool) are fast and reliable if done correctly. Soldered joints can be good too, but they must be sealed with heat-shrink. In high-vibration areas, some builders prefer crimped and shrink-sealed joints. The key is to avoid loose ends and ensure every join is insulated. Double-wall heat-shrink (with a glue-lined inner tube) provides extra moisture protection for both crimp and solder joints.
By focusing on high-quality materials and meticulous installation, you’ll end up with a wiring harness that the entire car can rely on. Whether you DIY in your garage or hire a professional, the steps are the same: plan thoroughly, use proper wire and connectors, and double-check your work. A well-built custom wire harness is like strong plumbing for your car’s electricity – it keeps the power flowing where and when it should, even in the heat of competition or spirited street driving.
.avif)
Sam Wu is the Marketing Manager at Romtronic, holding a degree in Mechatronics. With 12 years of experience in sales within the electronic wiring harness industry, he manages marketing efforts across Europe. An expert in cable assembly, wiring harnesses, and advanced connectivity solutions, Sam simplifies complex technologies, offering clear, actionable advice to help you confidently navigate your electrical projects.

